 Save
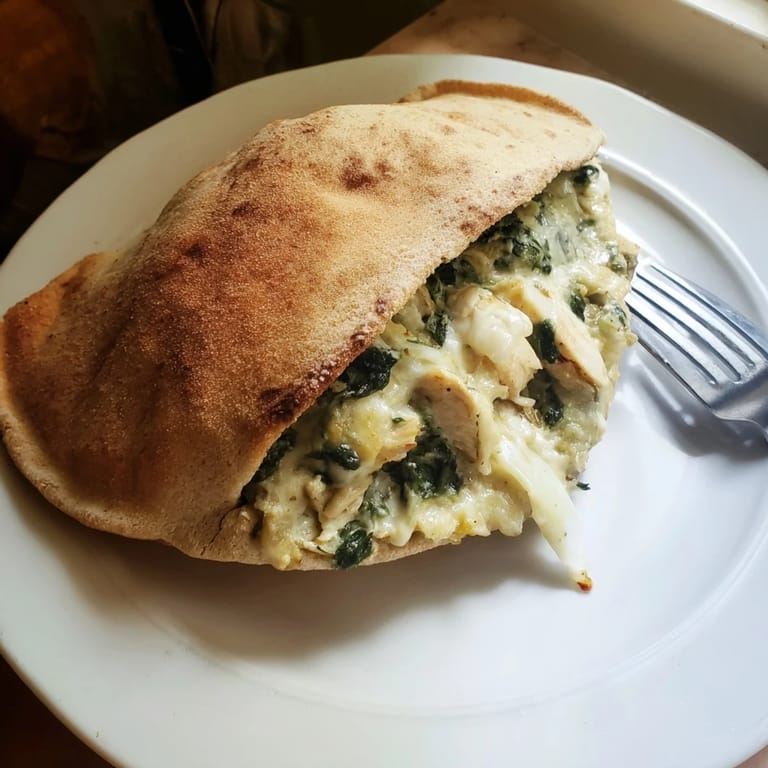
Save The smell of garlic and melted cheese pulled my roommate out of her room on a Tuesday night when I was testing this recipe for the third time. She stood in the doorway, arms crossed, and said, "What is that and why wasn't I invited?" I handed her a warm pita half, still too hot to hold comfortably, and watched her face change from skeptical to surprised to completely won over. That's when I knew this wasn't just another weeknight dinner. It was the kind of thing you make again and again because it works, it tastes incredible, and it makes people happy without any fuss.
I started making this after a particularly uninspired week of meal prep where everything tasted like obligation. I had spinach wilting in the fridge, a jar of artichokes I kept forgetting about, and leftover chicken from Sunday. Instead of throwing it all into another sad grain bowl, I mixed it with yogurt and cheese, stuffed it into pita, and baked it until everything melted together. My partner took one bite and said, "This is better than takeout." I agreed. It became our go to whenever we wanted something that felt indulgent but didn't require much effort or planning.
Ingredients
- Cooked chicken breast: This is your protein base, use rotisserie chicken to save time or leftover grilled chicken for deeper flavor.
- Canned artichoke hearts: Make sure to drain them well and chop them into bite sized pieces so they blend into the filling without clumping.
- Fresh spinach: Chop it finely so it wilts into the creamy mixture, you can also use frozen spinach if you thaw and squeeze out all the water first.
- Greek yogurt: This adds tang and creaminess without being too heavy, it also keeps the filling moist during baking.
- Light mayonnaise: Brings richness and helps bind everything together, you can use full fat mayo if you prefer a more indulgent texture.
- Shredded mozzarella cheese: Melts beautifully and gives that gooey, stretchy bite everyone loves.
- Grated Parmesan cheese: Adds a sharp, nutty depth that balances the creaminess of the other ingredients.
- Garlic: Fresh minced garlic is key here, it wakes up the whole filling with just one clove.
- Onion powder: A quiet background flavor that makes everything taste more complete without adding moisture.
- Dried oregano: Brings a subtle Mediterranean warmth that ties the spinach and artichoke together.
- Crushed red pepper flakes: Optional, but a pinch adds a gentle heat that makes the filling more interesting.
- Salt and black pepper: Taste as you go, the cheeses add salt so start light and adjust at the end.
- Large pita breads: Whole wheat adds a nutty flavor, but regular pita works just as well and crisps up nicely in the oven.
- Fresh parsley and lemon wedges: A bright finishing touch that cuts through the richness and makes each bite feel fresher.
Tired of Takeout? 🥡
Get 10 meals you can make faster than delivery arrives. Seriously.
One email. No spam. Unsubscribe anytime.
Instructions
- Preheat and Prep:
- Set your oven to 375°F and let it warm up while you get everything ready. This temperature is perfect for heating the filling through without drying out the pita.
- Mix the Filling:
- In a large bowl, combine the chicken, artichokes, spinach, yogurt, mayo, both cheeses, garlic, onion powder, oregano, red pepper flakes, salt, and pepper. Stir until everything is evenly coated and creamy, this is where the magic starts to happen.
- Prepare the Pitas:
- Slice each pita in half to create two pockets, be gentle so they don't tear. If your pitas are thick, you can warm them slightly to make them easier to open.
- Stuff Generously:
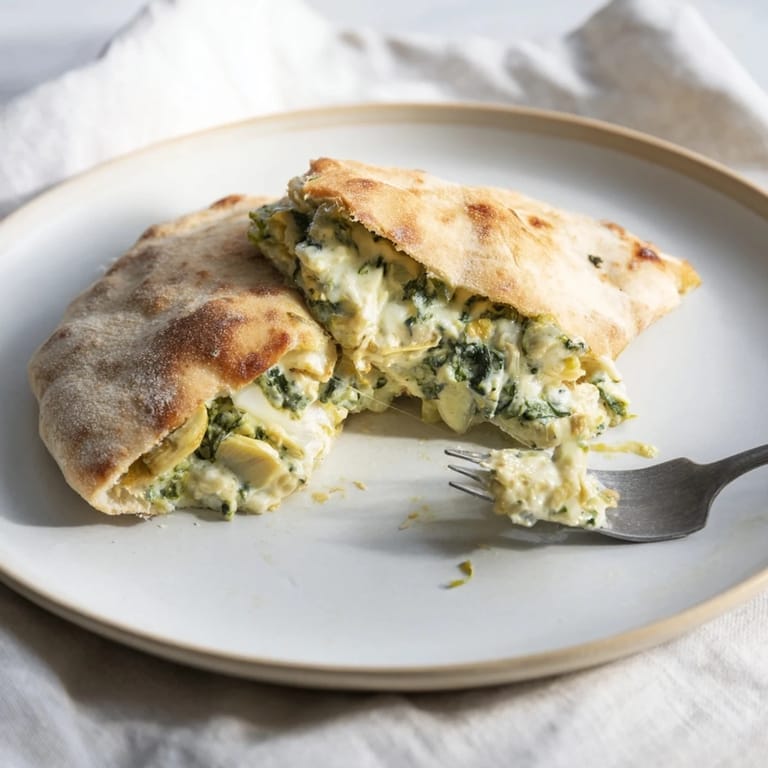
- Spoon the filling into each pita half, packing it in but not so much that it bursts. You want every bite to be full of that creamy, cheesy goodness.
- Arrange and Bake:
- Place the stuffed pitas on a parchment lined baking sheet, leaving a little space between each one. Bake for 15 to 20 minutes until the filling is bubbling and the cheese has melted into a golden, gooey layer.
- Garnish and Serve:
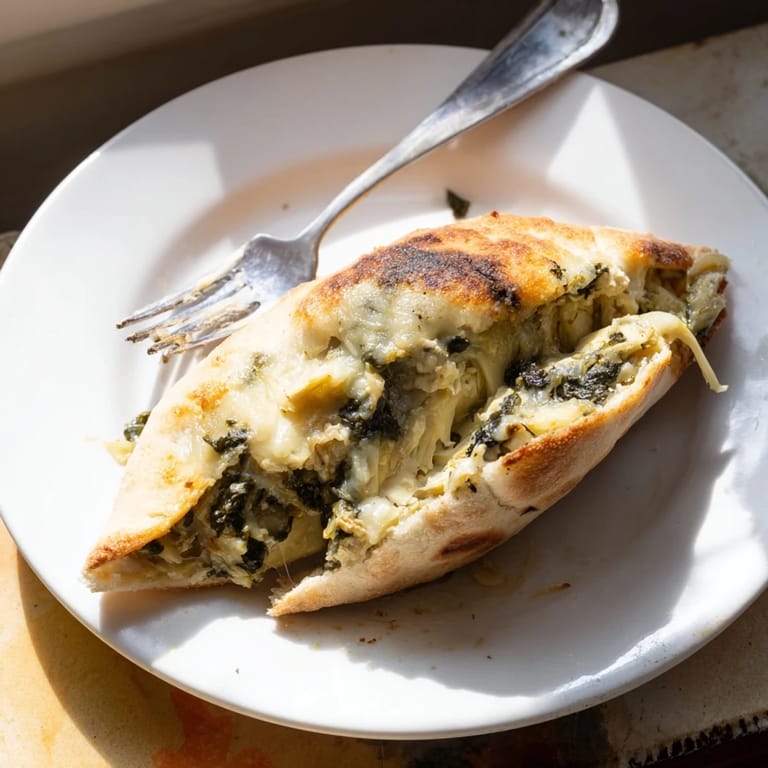
- Pull them out of the oven, sprinkle with fresh parsley, and serve with lemon wedges on the side. The lemon brightens everything up and adds a little zing that makes each bite feel complete.
 Save
Save One night I made these for a small dinner with friends, and instead of plating them individually, I just set the baking sheet in the center of the table with a pile of napkins. Everyone grabbed one, then another, and we ended up talking and laughing longer than we had in months. It wasn't fancy, but it felt generous and easy, the kind of meal that lets you focus on the people instead of the presentation. That's when I realized this recipe wasn't just about convenience, it was about creating space for connection without stress.
Make Ahead Tips
You can mix the filling up to two days in advance and store it in an airtight container in the fridge. When you're ready to eat, just stuff the pitas and bake them fresh. I've also frozen the assembled, unbaked pitas wrapped tightly in foil, then baked them straight from frozen at 350°F for about 30 minutes. It's a lifesaver on nights when you need dinner to practically make itself.
Swaps and Variations
If you want a richer filling, swap the Greek yogurt for cream cheese and watch it turn even more decadent. I've added sun dried tomatoes and roasted red peppers when I had them on hand, and both brought a sweet, tangy brightness that made the filling feel a little more special. You can also use turkey instead of chicken, or even swap the pita for naan or flatbread if that's what you have. The filling is forgiving and adapts to whatever direction you want to take it.
Serving Suggestions
These pitas are hearty enough to stand alone, but I love serving them with a crisp green salad dressed in lemon vinaigrette to balance the richness. A side of tzatziki or hummus also works beautifully for dipping. If you're feeding a crowd, slice the stuffed pitas into halves or thirds and serve them as warm appetizers, they disappear fast.
- Pair with a simple arugula salad tossed with olive oil, lemon, and shaved Parmesan.
- Serve alongside roasted vegetables like zucchini, bell peppers, or cherry tomatoes.
- Offer extra lemon wedges and a drizzle of hot sauce for guests who like a little extra kick.
 Save
Save This recipe has earned a permanent spot in my weekly rotation because it's reliable, satisfying, and always feels like a treat even when it's just a regular Wednesday. I hope it becomes one of those meals you reach for when you want something good without the fuss.
Recipe Questions & Answers
- → Can I prepare the filling ahead of time?
Yes, you can mix the filling up to 24 hours in advance and store it in an airtight container in the refrigerator. Stuff the pitas and bake when ready to serve.
- → What can I use instead of Greek yogurt?
Cream cheese creates a richer, more decadent filling. You can also use ricotta cheese or sour cream for different flavor profiles. Adjust quantities based on desired consistency.
- → Can I use frozen spinach?
Absolutely. Thaw frozen spinach completely and squeeze out excess moisture before adding to the filling to prevent the mixture from becoming watery.
- → How do I store leftovers?
Store any leftover stuffed pitas in an airtight container in the refrigerator for up to 3 days. Reheat in a 350°F oven for 10 minutes or microwave for 1–2 minutes.
- → What are some good side dish pairings?
A crisp green salad with lemon vinaigrette complements the creamy filling beautifully. Roasted vegetables, hummus with crudités, or a light tzatziki sauce are also excellent accompaniments.
- → Can I make this without cheese?
Yes, you can omit the cheese and increase Greek yogurt or add more vegetables like diced tomatoes and cucumbers. The filling will be lighter and less rich but still flavorful.