 Save
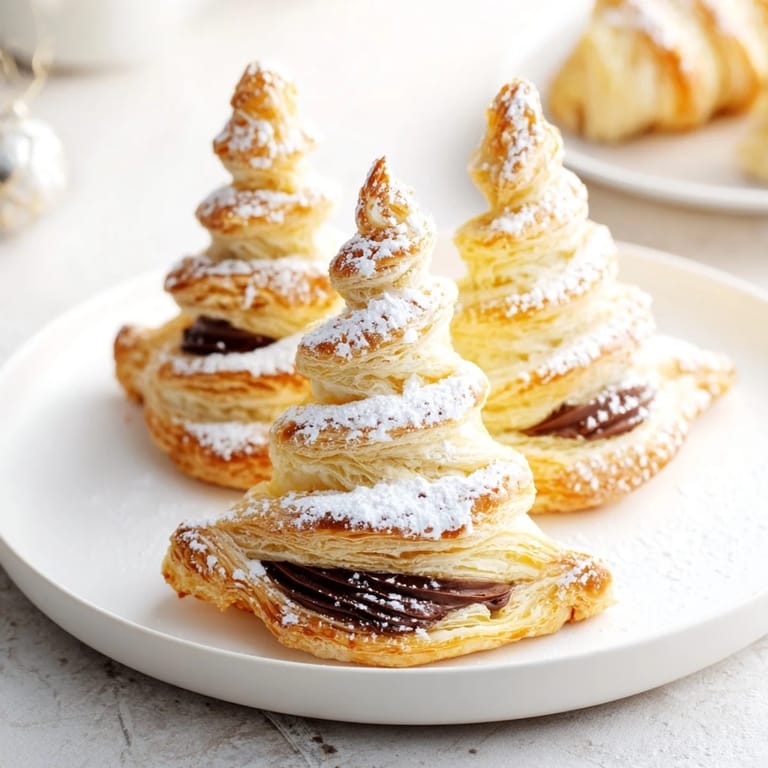
Save There's something magical about December mornings in a kitchen that smells like chocolate and butter. I discovered these Nutella Christmas trees while watching my neighbor frost her gingerbread—she noticed my puff pastry thawing on the counter and casually mentioned she'd been craving something chocolate for the holidays. Twenty minutes later, I had golden pastry trees cooling on racks, and she was already asking for the recipe. They've become my go-to festive dessert ever since.
I made a batch for my daughter's school holiday party and watched three kids ask for seconds before the tray was even cleared. One little boy called them 'fancy chocolate trees' and that stuck—now our whole family uses that name. It's funny how food can accidentally become part of family vocabulary.
Ingredients
- Puff pastry (2 sheets, about 250 g each): Buy frozen and thaw at room temperature for about 30 minutes—rushing this step makes them stick to your hands and tear.
- Nutella (120 g): This creamy chocolate-hazelnut spread is the star here, though you can substitute any good chocolate spread you have on hand.
- Egg (1, beaten for egg wash): This creates that gorgeous golden-brown shine and helps everything puff up beautifully in the oven.
- Powdered sugar (1 tbsp, optional): A light dusting mimics fresh snow and adds a subtle sweetness to the finish.
Tired of Takeout? 🥡
Get 10 meals you can make faster than delivery arrives. Seriously.
One email. No spam. Unsubscribe anytime.
Instructions
- Prep Your Station:
- Preheat your oven to 200°C (400°F) and line a baking tray with parchment paper—this prevents sticking and lets the pastry puff evenly underneath. Let your thawed pastry sheets sit on the counter for a few minutes if they feel too cold to work with.
- Layer the Nutella:
- Unroll one sheet of puff pastry and spread the Nutella evenly across it, leaving about a 1-cm border untouched—this border acts like glue when you press the sheets together. Place the second sheet on top and press gently so they bond, working from the center outward to avoid air bubbles.
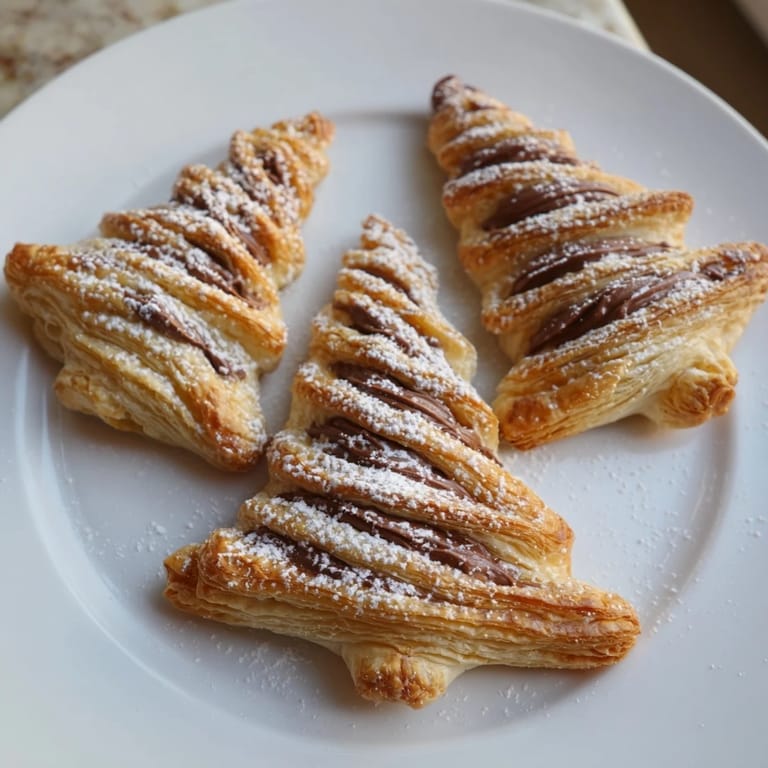
- Cut Into Trees:
- Using a sharp knife or tree-shaped cookie cutter, cut out trees about 12–15 cm tall; if your cutter seems to stick, dip it in flour between cuts. Gather any scraps and re-roll them together to cut out a few more trees—nothing goes to waste.
- Add Decorative Branches:
- With a sharp knife, cut small horizontal lines on both sides of each tree, leaving the center trunk completely intact so it stays structurally sound. Gently twist each 'branch' in opposite directions for a spiraled, festive look that catches light when baked.
- Finishing Touches:
- Brush each tree carefully with beaten egg using a pastry brush, getting into the crevices and between branches so every part glistens. This egg wash is what gives you that picture-perfect golden finish.
- Bake Until Golden:
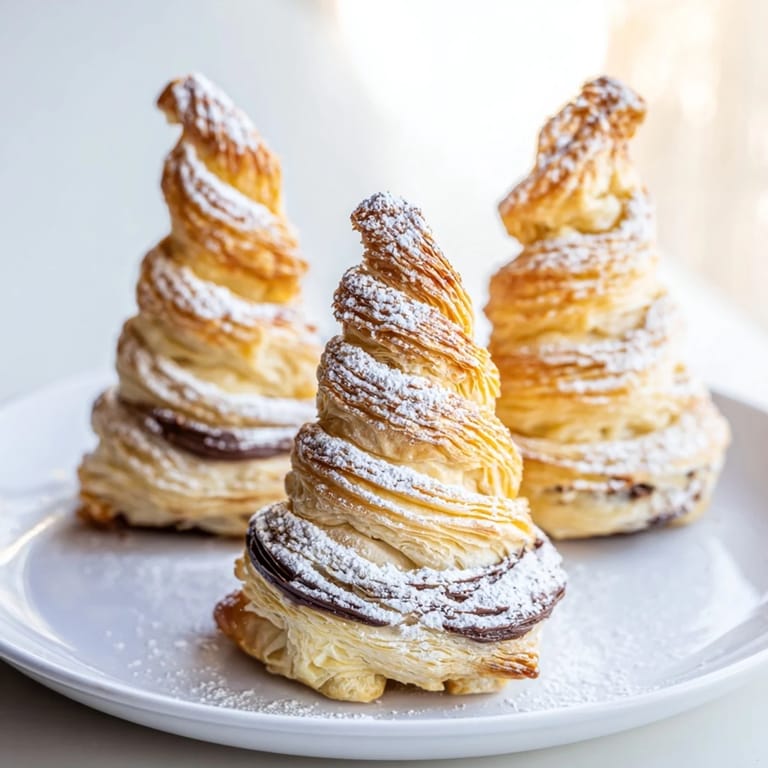
- Slide the tray into the oven for 16–18 minutes—they'll puff dramatically and turn a deep, warm golden brown when they're ready. The kitchen will smell incredible, and that's usually a good sign they're almost done.
- Cool and Serve:
- Let them cool on the tray for 2–3 minutes so they firm up slightly, then transfer to a rack if you want them extra crispy on the bottom. Dust with powdered sugar right before serving for that snow-covered effect.
 Save
Save The best moment came when my sister's five-year-old held one up to the window light and said it looked like a real tree, then actually ate the whole thing. Those little moments remind you why simple, festive food matters.
Make-Ahead Magic
You can assemble the pastry trees up to 8 hours ahead and refrigerate them on the baking tray, covered loosely with plastic wrap—this actually helps them puff even better because the dough relaxes. Just add 1–2 extra minutes to the bake time if baking straight from the fridge. I often prep them in the morning and bake them right before guests arrive so they're warm and crispy when served.
Flavor Variations
Once you master the basic version, experimenting becomes fun. I've filled these with chocolate spread mixed with crushed hazelnuts for extra crunch, and once I drizzled them with melted white chocolate after baking for a snowy effect. You can even add a pinch of sea salt on top before baking if you like that sweet-salty contrast that makes chocolate taste richer.
Serving Suggestions
These trees shine when paired with warm drinks—hot chocolate, espresso, mulled wine, or even eggnog all feel natural alongside them. They're equally at home as an afternoon treat or plated as a dressy dessert. I've also dipped the branches in melted chocolate for extra indulgence, and packed them in small boxes for holiday gifts wrapped in tissue paper.
- Serve them slightly warm when the chocolate is still soft and the pastry is at its crispiest.
- If they sit out and soften, pop them back in a 180°C oven for 3–4 minutes to restore the crunch.
- These stay fresh at room temperature for about 2 days in an airtight container, though honestly they rarely last that long.
 Save
Save These pastry trees have become my favorite way to add a homemade touch to holiday gatherings without spending hours in the kitchen. Every batch tastes like butter and chocolate, and feels like December.
Recipe Questions & Answers
- → Can I substitute Nutella with other spreads?
Yes, you can use any chocolate-hazelnut spread or even a thick chocolate ganache for a similar rich filling.
- → How do I shape the pastry into Christmas trees?
Cut tree shapes using a sharp knife or a tree-shaped cookie cutter, then twist the branches carefully to create a decorative look.
- → Is it necessary to brush the pastry with egg wash?
Brushing with beaten egg enhances the golden color and gives a shiny finish but can be omitted for dietary preferences.
- → How should these pastries be served?
They are delicious served warm or at room temperature and pair wonderfully with hot chocolate or mulled wine.
- → Can I prepare the pastry trees ahead of time?
Prepare and shape the trees in advance, then bake just before serving. Leftovers reheat well in the oven to regain crispness.