 Save
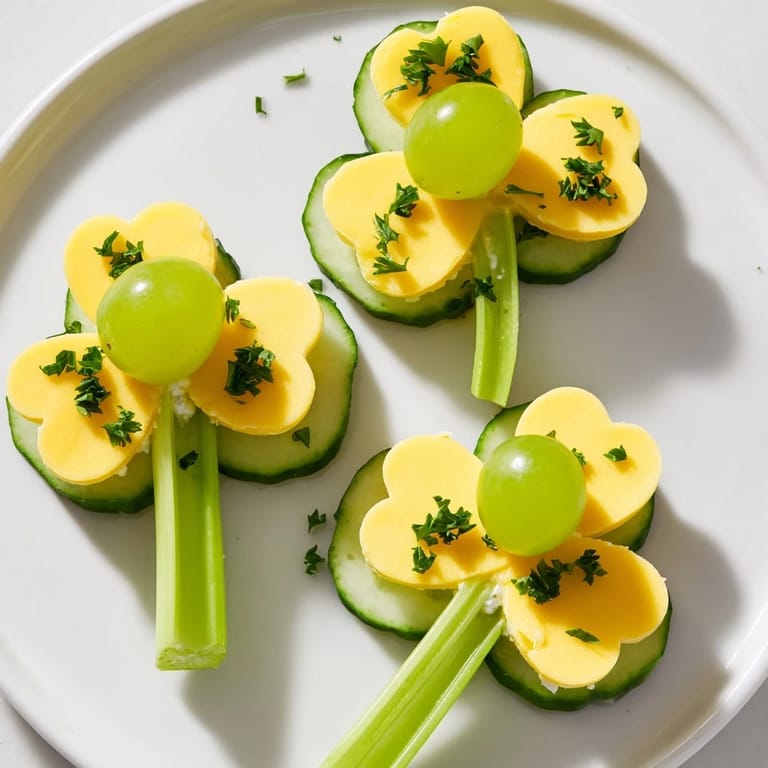
Save I'll never forget the first time I made these Lucky Four-Leaf Clover snacks—it was the morning of my daughter's school St. Patrick's Day party, and I wanted something that felt special but didn't require hours in the kitchen. As I arranged the cucumber and cheese pieces on the plate, something magical happened: what started as simple ingredients transformed into these cheerful little clovers that made everyone smile. Now, whenever we need a festive touch or a reminder that luck is sometimes just about the care you put into small things, these snacks appear on our table.
I learned the real power of this snack at a neighborhood gathering last spring when a shy kid who rarely ate vegetables piled three of these clovers onto his plate. His mom was shocked—until he told her it felt like he was building something, not just eating. That's when I understood: sometimes presentation and playfulness unlock appetites in ways ordinary vegetables never could.
Ingredients
- Cucumbers (16 rounds, about 1/4-inch thick): These form the four-leaf base and bring a refreshing crunch that balances the richness of cheese. Pick firm, smaller cucumbers if possible—they're easier to slice uniformly and less watery.
- Cheddar cheese (16 thin rounds): Sharp cheddar has the color and flavor to make these clovers come alive, and it actually holds up better than softer cheeses when you're assembling. A small cookie cutter makes these rounds perfectly uniform.
- Green grapes or cherry tomatoes, halved (4 total): These become the lucky center of each clover—choose whichever feels more festive. Grapes add sweetness; cherry tomatoes bring a subtle tang that's equally delightful.
- Celery sticks or pretzel rods (4, cut to 3 inches): The stem anchors everything. Fresh celery is mild and healthy; pretzel rods add a satisfying crunch and work beautifully for gluten-eaters.
- Cream cheese or hummus (2 tablespoons): Just a tiny dab acts as your edible glue, holding pieces together without being obvious. Use whichever fits your guests' preferences.
- Fresh herbs—parsley or dill (finely chopped): A sprinkle of green herbs transforms these from cute to restaurant-worthy, adding flavor and making every clover look intentional.
Tired of Takeout? 🥡
Get 10 meals you can make faster than delivery arrives. Seriously.
One email. No spam. Unsubscribe anytime.
Instructions
- Gather and prep everything first:
- Slice your cucumbers into neat rounds—a sharp knife and a steady hand make this easier. Cut or press your cheese into matching rounds using a small cookie cutter if you have one (or just freehand them; imperfection is charming). Halve your grapes or tomatoes and cut your celery or pretzel rods to 3-inch lengths. Having everything ready before you start assembling means you'll move quickly and nothing will dry out.
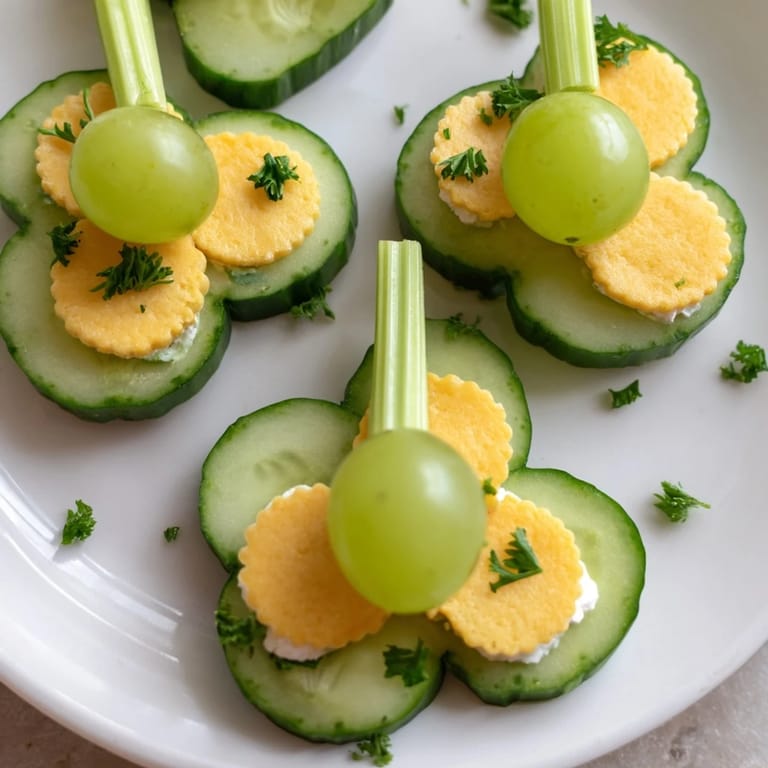
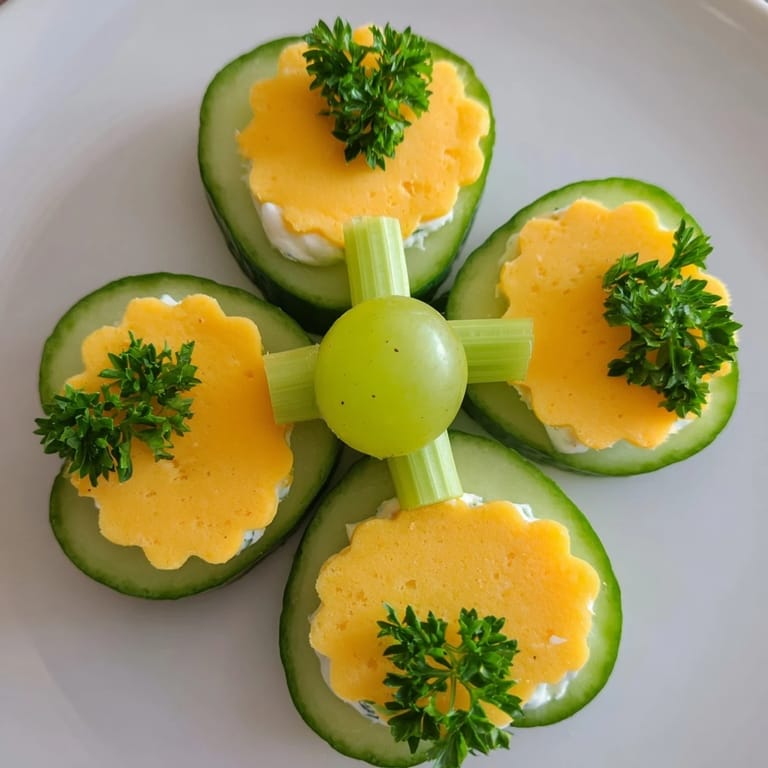
- Arrange the four-leaf base:
- On your serving plate, take four cucumber slices and overlap them slightly in the center so they form a four-leaf clover shape. Imagine the compass directions—north, south, east, west—and position each leaf pointing outward. The slight overlap is what gives it that authentic clover look.
- Crown each leaf with cheese:
- Top each cucumber round with a cheddar cheese round. You'll see the clovers starting to emerge now, and it's genuinely fun to watch. The yellow-orange of the cheese against the pale green cucumber is exactly the palette of luck and spring.
- Place the lucky center:
- At the heart where all four leaves meet, position your grape or tomato half. Press it down gently—it should sit nestled and secure. This is the most important moment: the center holds the whole clover together visually and flavor-wise.
- Add the stem:
- Tuck one end of your celery stick or pretzel rod slightly under the clover leaves, so it looks like a natural stem growing upward. This is where a tiny dab of cream cheese comes in handy if needed—it'll hold everything in place without anyone knowing.
- Garnish and finish:
- Sprinkle a pinch of fresh parsley or dill over the whole clover. This final touch makes it look intentional and adds a fresh flavor that brightens everything. Step back and admire your work—you've just created something that looks like it took hours.
- Repeat for the remaining three clovers:
- Make three more following the same pattern. Arrange them on your serving plate with a little space between each one so they're easy to grab.
 Save
Save There was one moment during a potluck when a grandmother reached for one of these clovers, paused, and said, "These are too pretty to eat." Her granddaughter solved that problem by demonstrating the crunch, and within minutes, that grandmother had taken another. That's when I realized these snacks aren't just about luck—they're about giving people permission to play a little, even if they're grown up.
Why This Assembly Approach Works
Building these clovers in layers—vegetables first, then cheese, then center, then stem—creates stability at every step. The overlapping cucumbers form a sturdy base; the cheese adheres gently without needing much help; the grape or tomato nestles naturally into the center; and the celery or pretzel rod stands proud. It's construction that feels like art, and that's partly why people love making these alongside you.
Variations That Keep Things Fresh
Once you've mastered the classic clover, the fun really begins. Swap the grapes for cherry tomatoes if you want something savory-bright, or use different cheeses—white cheddar for a milder taste, smoked cheddar for depth. Turkey or ham rounds can replace cheese entirely for those who want extra protein. Even the stem has options: celery is fresh and vegetables-forward, pretzel rods offer salty-crispy contrast, and thin breadsticks work beautifully for a gluten-friendly crowd. The beauty is that the structure stays the same while you adapt to who's eating and what's in season.
Serving Moments and Party Ideas
These clovers shine in moments where presentation matters as much as taste. Arrange them on a green platter with fresh herb sprigs tucked around them for a St. Patrick's Day spread that feels intentional. Pack them carefully into lunchboxes on days when kids need a little extra luck at school. Set them out during spring gatherings, baby showers, or anytime you want the table to feel festive without being overwhelming. They're also wonderful for building with kids on a rainy afternoon—let them arrange their own clovers and watch their faces light up when they realize they've created something beautiful.
- Make these the morning of your event for the freshest possible crunch and vibrant colors
- Transport carefully in a single layer with parchment between clovers to prevent sliding
- Let guests add their own herb garnish for interactive, personalized snacks
 Save
Save These Lucky Four-Leaf Clover snacks are proof that sometimes the simplest ideas bring the most joy. Make them, share them, and watch how something so small becomes the moment people remember about your table.