 Save
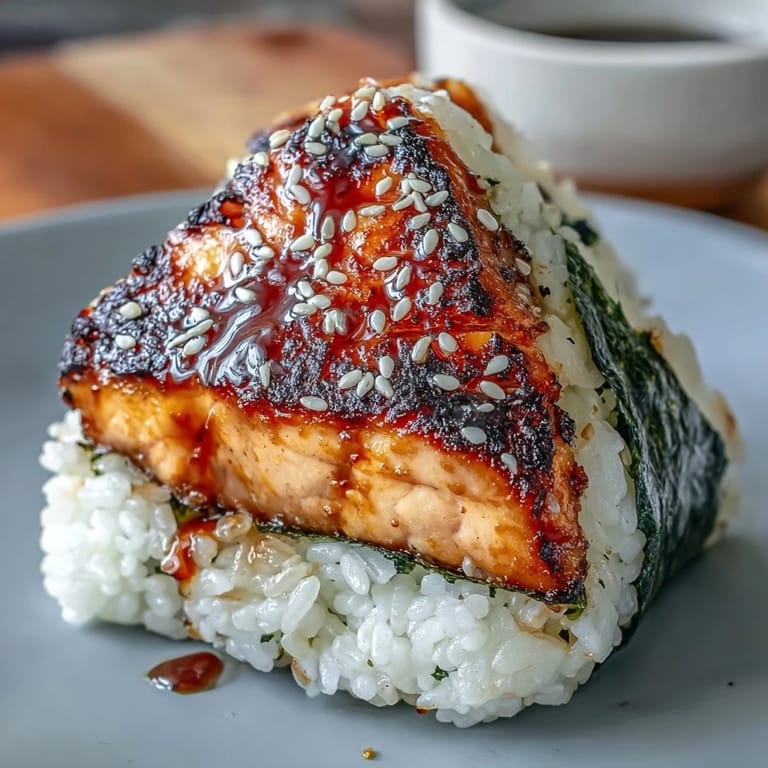
Save The sound of crisping rice against a hot skillet never fails to perk up my senses, especially when I'm making grilled salmon onigiri. One rainy afternoon, the idea struck after finding a small fillet of salmon in my fridge and remembering a train station snack in Tokyo that stole my heart years ago. The hush of steam rising from freshly cooked rice and the savory aroma of grilled fish, all captured in a warm little triangle—few things are more comforting. Making these at home felt like a perfect answer to a craving for something fresh, familiar, and just a bit playful. It’s become my go-to when I want a taste of Japan without leaving my kitchen.
I once packed a batch of these for a cherry blossom picnic, and my friends all swore they tasted better outdoors. There was something special about sharing them while bits of pink petals floated down, sticky fingers and all. Someone even asked if I’d secretly trained with a sushi chef (I hadn’t—just YouTube and stubbornness). Seeing everyone’s faces light up reminded me that food is really about small, joyful moments. This recipe has quietly become my little party trick whenever I want to surprise someone with something homemade but unexpected.
Ingredients
- Salmon fillet (200 g): Opt for skinless and as fresh as you can find—the better the salmon, the more flavorful your filling will be.
- Soy sauce (1 tsp): A tiny splash seasons the fish and deepens its umami; low-sodium works too if you prefer.
- Mirin (1 tsp): Adds subtle sweetness to balance the salty notes; don’t skip for that authentic bite.
- Toasted sesame oil (1/2 tsp): This imparts a whisper of nuttiness; a little gives a long finish, so measure carefully.
- Salt & black pepper (pinch each): Brightens and rounds out the salmon’s flavor.
- Japanese short-grain rice (2 cups): Absolutely essential; its stickiness is key for shaping (don’t substitute long-grain here).
- Water (2 1/4 cups): Enough to cook the rice until tenderly sticky.
- Salt for rice (1/2 tsp): Enhances the rice’s flavor base.
- Rice vinegar (1 tbsp, optional): Extra brightness and subtle tang if you enjoy sushi-style rice.
- Nori sheets (8 small, halved): These keep sticky hands at bay and deliver that briny finish—cut just before assembling to keep crisp.
- Toasted white sesame seeds (1 tbsp, optional): I love the pop of nutty flavor and color these bring scattered on top.
- Water (for shaping): Keep a small bowl nearby to help rice not glue to your hands while forming balls.
- Salt (for shaping): Just a pinch on your palms imparts subtle seasoning to the outer rice.
Tired of Takeout? 🥡
Get 10 meals you can make faster than delivery arrives. Seriously.
One email. No spam. Unsubscribe anytime.
Instructions
- Prep the Rice:
- Rinse those short grains under cold water until clear—it’ll turn cloudy at first, but don’t stop until you could mistake your rinse for mountain spring water. Cook the rice by your usual method; once it’s tender and steamy, let it rest covered for ten minutes before fluffing gently with a rice paddle and seasoning with salt and vinegar.
- Season and Grill the Salmon:
- Brush your salmon with the soy, mirin, oil, salt, and pepper, letting the glossy marinade soak in. Either pop it under a broiler or onto a grill until the flesh is opaque and easily flakes when prodded with a fork—around 8 to 10 minutes, then let cool slightly before breaking into soft flakes.
- Form the Onigiri:
- Set two little bowls handy: one with cold water, one with salt. Wet your palms, dab a pinch of salt on, scoop a small mound of warm rice, and flatten gently; nestle a spoonful of flaked salmon in the center, then cup, shape, and pinch into a firm triangle or oval, tucking the filling securely inside.
- Grill for the Crunch:
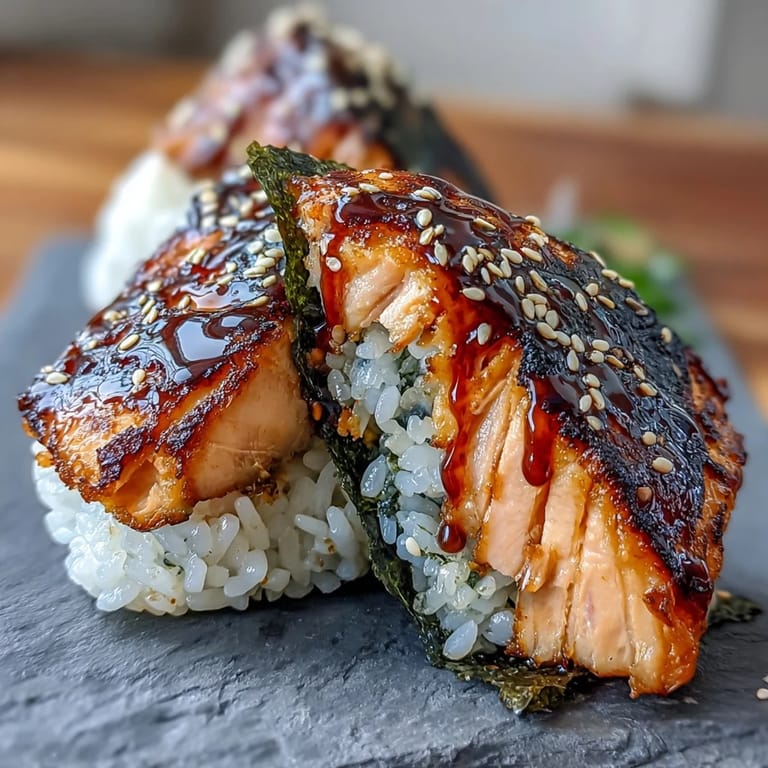
- Lightly oil your nonstick pan, then add onigiri triangles; listen for the gentle crackle! Grill 2 to 3 minutes each side until golden and tight, adding a quick brush of soy sauce for extra savoriness if you’re a fan.
- Wrap and Top:
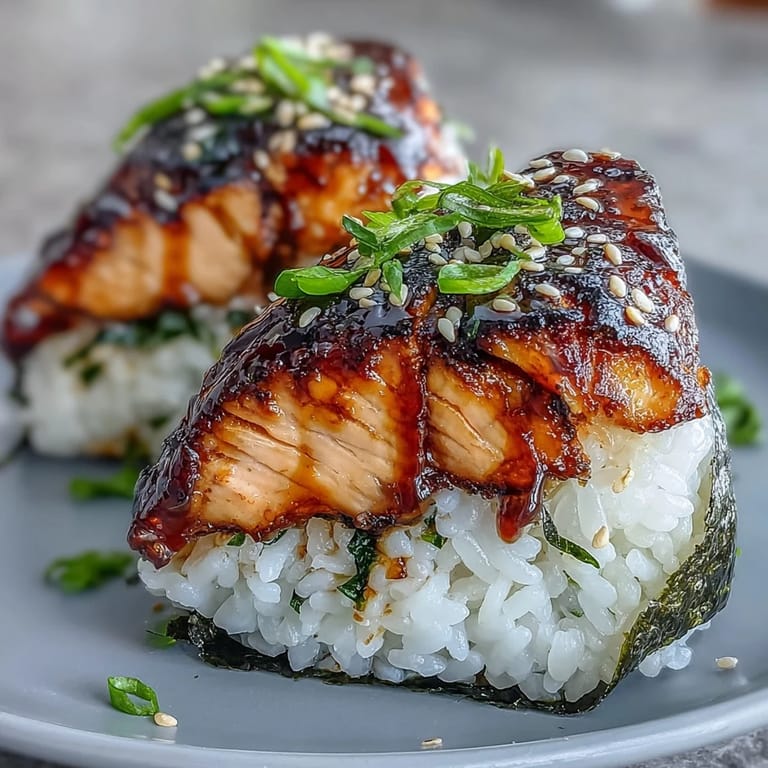
- Wrap each warm onigiri with a strip of crisp nori and sprinkle with sesame seeds, if you like some nutty crunch. Serve right away or let cool to room temperature for a perfect anywhere snack.
 Save
Save The first time my nephew tackled shaping rice balls with me, he ended up with more rice on his shirt than in the actual onigiri. We burst out laughing, then proudly ate our wonky, delicious creations anyhow. Ever since, I secretly hope for a batch that’s a little lopsided—it just means someone dove in with heart. These kitchen messes always taste better, shared with family or friends leaning over the counter. Watching someone taste their first homemade onigiri is a tiny moment of magic.
Getting the Salmon Just Right
If you’re using fresh salmon, keep an eye out for any bones before cooking—they can sneakily hide along the thickest part. Brushing the fillet with the full marinade gives it a shiny coat and keeps the moisture locked in as it broils or grills. The aroma is intense, so be ready for hungry stares from the next room. Flake the fish while it’s still barely warm for easier mixing without turning it mushy. Even leftovers work, but nothing beats the flavor when it’s just grilled.
The Art of Shaping Perfect Onigiri
Getting the rice just sticky enough takes a little practice, but the trick is to use water on your palms and salt your hands evenly. Squeeze gently around the filling—too tight and the rice gets gummy, too loose and the onigiri falls apart mid-bite. If you’ve ever ended up with a totally misshapen one, you’re in good company. I sometimes sprinkle a little extra sesame just to dress up any lumpy bits. Ultimately, the best onigiri are the ones you shaped with care, not perfection.
Swapping Fillings and Other Fun Tweaks
Canned salmon works well in a pinch, especially if you add a dab of wasabi or a sliver of pickled plum for brightness. Feel free to experiment—tuna, leftover grilled veggies, or even spicy mayo have made their way into my rice balls on lazy days. Just keep the filling modest so nothing escapes mid-bite.
- Adding furikake to the rice is my favorite shortcut for more flavor.
- Tightly wrapping the onigiri in plastic wrap helps keep them fresh if packing for later.
- Don’t forget: nori is best added just before eating for that craveable crispness.
 Save
Save There’s something quietly satisfying about unwrapping a homemade onigiri, its crisp shell yielding to a cloud of steam. Keep a few on hand for surprise cravings, and let every bite remind you how joyful homemade food can be.
Recipe Questions & Answers
- → What rice works best for onigiri?
Use short-grain Japanese rice for the best stickiness and texture. Rinse until the water runs clear, cook until tender, and let rest slightly before shaping.
- → How do I prevent the onigiri from falling apart?
Work with warm rice and wet your hands, rubbing a pinch of salt on your palms. Press the rice firmly but gently around the filling so the grains bind without being crushed.
- → Can I use canned salmon instead of fresh?
Yes—canned salmon can be flaked and seasoned as a convenient alternative. Fresh grilled salmon offers better texture and a smoky note, but canned works well for quick assembly.
- → How do I get a crisp, golden exterior?
Lightly oil a nonstick skillet and pan-sear the formed onigiri over medium heat for 2–3 minutes per side. Brushing a little soy sauce before flipping adds color and savory glaze.
- → Any tips for shaping neat triangles?
Use about 1/3 cup warm rice, flatten it, place filling in the center, then fold and press into shape. Keep hands moist and avoid overhandling to maintain grain integrity.
- → How should I store and reheat leftovers?
Store wrapped at room temperature for a few hours or refrigerated up to 24 hours. Reheat gently in a skillet or oven to restore crispness rather than microwaving, which can make rice gummy.